Device Descriptor – accessing the sensor manager
Time for another look at some more functionality in the Device Description app, specifically the Sensor Manager.
How much do you know about the sensors in your phone? And how much do you want to know about the sensors in your phone? Your answers will give a good guide on whether you would be interested in the Device Description app, recently released as part of this Build Your Own Android App series…
Accessing the sensor manager
First you have to get an instance of the class SensorManager using getSystemService():
mSensorManager = (SensorManager) getSystemService(Context.SENSOR_SERVICE);
The next thing to do is to get a list of all the sensors under the control of the manager – the exact number will vary from device to device, of course, so you’ll need to loop through them.
List<Sensor> deviceSensors = mSensorManager.getSensorList(Sensor.TYPE_ALL);
for(int i=0; i<deviceSensors.size(); i++) {
And now we can get to the real material, accessing the various public functions that furnish details about your device. Such as:
deviceSensors.get(i).getStringType()
deviceSensors.get(i).getType()
deviceSensors.get(i).getVendor()
deviceSensors.get(i).getName()
deviceSensors.get(i).getVersion()
deviceSensors.get(i).getPower()
deviceSensors.get(i).getResolution()
deviceSensors.get(i).getMinDelay()
deviceSensors.get(i).getMaximumRange()
deviceSensors.get(i).isWakeUpSensor()
deviceSensors.get(i).toString()
The toString() function basically summarises all the other fields, in String form.
Couldn’t be simpler. From this I can see the details of my phone’s sensors. For example, there’s an accelerometer made by ST Micro – the “LIS3DH 3-Axis Accelerometer”. I can see the power draw (0.25mA), the resolution it works to, the minimum delay for readings ( and the maximum range).
There’s also an Asahi Kasei AK8963 3-axis Magentic Field sensor, an Asahi Kasei AK8963 Orientation sensor, the TAOS CT406 Proximity Sensor, the TAOS CT406 Light sensor and a Motorola Display Rotation sensor. Hurrah.
Orientation sensors
Why two orientation sensors, I wondered? Our esteemed editor had the answer, confirmed by the power fields. Given that a phone constantly needs to check the orientation of its display – switching between portrait and landscape – this basic sensor operation needs to be always on, using a minimum of power. This role sees to be fulfilled by the Motorola Display Rotation sensor, drawing 0.0mA (!) “officially”, as compared with the Asahi Kasei AK8963 Orientation sensor, drawing 7.05mA, presumably used for special, heavy listing.
What do I really learn from all this information. Not a lot, but I find it intriguing, which is the whole purpose of the app. It also tempts me to investigate using the sensors more directly. A spirit-level app, perhaps? (!)
So, of course, info is always available about the spec of your phone from various manufacturers sites (otherwise why would you choose to buy the particular model that you did). But there is more information to be discovered and I think it is nice to be able to dig a bit further.
For example, when choosing a new phone and investigating the Moto G on the Motorola website, its detailed spec simply included this information about sensors:
| Sensors | |
| Compass/ Magnetometer | Yes |
| Proximity sensor | Yes |
| Accelerometer | Yes |
| Ambient light sensor | No |
| Gyroscope | No |
| Barometer | No |
| Temperature sensor | No |
What are your thoughts? Leave a comment below.
Coming next will be the TelephonyManager.
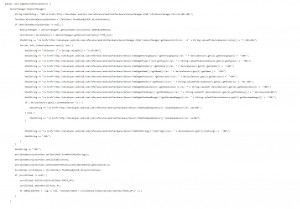
The full “log Sensors” procedure from the app is below, showing the exact Java involved: